

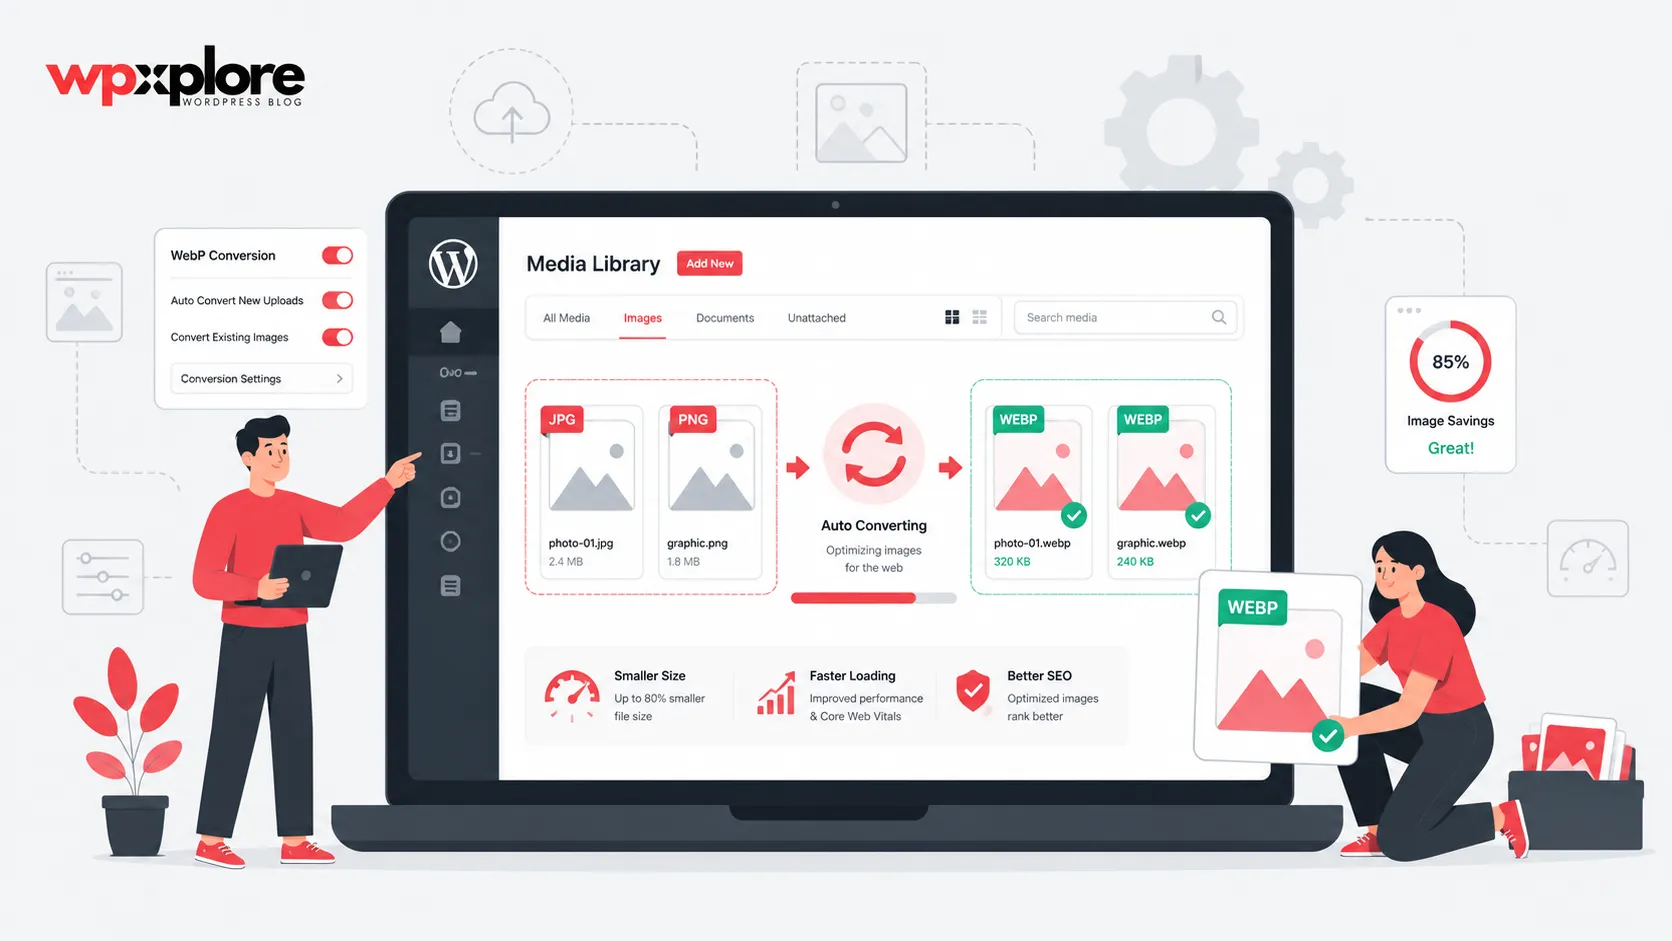

- The fastest, cleanest way to convert media images to WebP in WordPress is to do it automatically at the moment of upload. Auto WebP Converter by wpXplore ($19/year, 15-day free trial, available at wpxplore.com/tools/auto-webp-converter) does exactly that, storing only the WebP and generating every WordPress thumbnail size from it.
- Per Google’s own WebP Compression Study, lossy WebP files average 25–34% smaller than JPEG at equivalent quality, and lossless WebP is about 26% smaller than PNG. Those savings flow straight through to page speed, Core Web Vitals, and search rankings.
- Unlike most optimization plugins that keep two copies of every image (doubling storage), Auto WebP Converter converts before WordPress stores the file, with built-in safety nets so uploads never break and animations are never touched.
Why Your WordPress Images Are Quietly Slowing You Down
Images are the heaviest thing on most web pages. According to HTTP Archive’s Web Almanac, images are consistently one of the largest contributors to total page weight, and unoptimized images are repeatedly identified as the single biggest source of page bloat. If your media library is full of JPEGs and PNGs straight from a phone or a stock site, you’re shipping megabytes to every visitor on every page.
That weight has real, measurable consequences:
- Bounce rate climbs fast. Per Google/SOASTA’s 2017 research published in Mobile Page Speed: New Industry Benchmarks (Think with Google), “As page load time goes from one second to 3 seconds the probability of bounce increases 32%,” rising to a 90% increase as load time stretches from 1 to 5 seconds, and 123% from 1 to 10 seconds.
- Slow sites lose customers. Per Google/DoubleClick’s September 2016 study The Need for Mobile Speed (Alex Shellhammer), “53% of mobile site visits are abandoned if pages take longer than 3 seconds to load.”
- Core Web Vitals are a ranking factor. Google’s Largest Contentful Paint (LCP) metric, for which a “good” score is 2.5 seconds or less measured at the 75th percentile of page loads per Google’s web.dev guidance, is very often triggered by your hero image. Shrink that image, and LCP improves.
The single highest-leverage fix is switching your images to WebP.
What Is WebP (and Why Google Wants You to Use It)
WebP is a modern image format developed by Google. Per Google’s WebP Compression Study (which tested the Kodak and Tecnick image suites), “the average WebP file size is 25%-34% smaller compared to JPEG file size at equivalent SSIM index,” and per Google’s WebP documentation, “WebP lossless images are 26% smaller in size compared to PNGs,” with transparency fully supported in both lossy and lossless modes.
Two things make WebP a safe bet in 2026:
- Browser support is effectively universal. WebP is supported by every modern browser: Chrome, Safari, Firefox, Edge, Opera, and mobile browsers. Global support sits at roughly 97.4% as of April 2026 (per caniuse.com/webp); the remaining 2–3% is mostly legacy Internet Explorer 11 and pre-iOS 14 devices. Safari was the last major browser to add support, in version 14 (September 2020), so this has been settled for years.
- Google actively rewards it. PageSpeed Insights and Lighthouse flag old formats with the “Serve images in next-gen formats” warning. WebP clears that audit.
The Problem With How Most Plugins Do It
Here’s the catch most tutorials skip. WordPress has supported displaying WebP since version 5.8 (“Tatum,” released July 20, 2021; the release announcement noted WebP images are “around 30% smaller on average than their JPEG or PNG equivalents”), but WordPress core will not convert your uploads for you. So people reach for an optimization plugin, and most of them work the same way: they keep your original JPEG/PNG and generate a WebP copy alongside it, then serve the WebP conditionally. That means every image now exists twice on your server, roughly doubling image storage and inflating your backups.
Auto WebP Converter takes a fundamentally different approach: it converts the image to WebP before WordPress ever stores it, and by default keeps only the WebP. Every WordPress thumbnail size is then generated from that WebP, so all sizes are optimized, not just the full-size image.
Meet Auto WebP Converter by wpXplore
Auto WebP Converter is a WordPress plugin from wpXplore (wpxplore.com) that converts images to WebP automatically at the moment of upload. No buttons to press, no bulk jobs to babysit. It’s a genuine “set-and-forget” tool. The plugin is available for $19/year with a 15-day free trial (listed at wpxplore.com/tools/auto-webp-converter/), so you can confirm it works on your site before committing.
What it does, in plain English:
- Converts JPEG and PNG uploads to WebP automatically, before the file is saved.
- Stores only the WebP file (unless you turn on “Keep Original Images”).
- Generates every WordPress thumbnail size from the WebP, so all image sizes are optimized.
- Uses the Imagick library (recommended) with a GD fallback for maximum host compatibility.
- Includes built-in support for the Directorist directory plugin, including visitor-submitted listings, and automatically makes Directorist accept
.webpfiles.
The safety nets that make it trustworthy:
- It never makes things worse. If the WebP version wouldn’t actually be smaller than the original, the plugin keeps the original file.
- Uploads never break. If anything fails during conversion, the upload still succeeds with the original file.
- Animated GIFs are never converted. They’re automatically detected and left alone, so your animations always keep working.
How it works (the pipeline)
| Step | What happens |
|---|---|
| 1 | An image is uploaded (by you or a site visitor). |
| 2 | Before WordPress stores it, the plugin converts it to WebP at your chosen quality. |
| 3 | The plugin compares file sizes and only replaces the original if the WebP is smaller. |
| 4 | WordPress stores the result and generates all thumbnail sizes from it. |
| 5 | If “Keep Original Images” is on, the original is saved alongside in the Media Library. |
Because everything happens at upload time on your own server, there’s zero impact on your visitors. Nothing runs on your public pages, and conversion adds only a fraction of a second at upload.
Requirements (Check These First)
- WordPress 5.0 or higher
- PHP 7.0 or higher
- One of these PHP image libraries: Imagick (recommended) or GD with WebP support
If your server has neither, the plugin shows a clear admin notice telling you exactly what to ask your host for, and uploads keep working normally (just unconverted). Most quality hosts already have Imagick or GD available; if not, a quick support ticket usually resolves it.
Step-by-Step: Install and Set Up Auto WebP Converter
Step 1: Install the plugin. Upload the plugin to /wp-content/plugins/, or in your dashboard go to Plugins → Add New → Upload Plugin and upload the ZIP.
Step 2: Activate it. Click Activate from the Plugins screen.
Step 3: Review the settings. Go to Settings → Auto WebP Converter. The defaults work well for most sites, so you can leave them as-is.
Step 4: Test it. Upload a JPEG through Media → Add New. Check your Media Library. The filename will end in .webp and the file size will be dramatically smaller. That’s it. Every future upload is now automatic.
(Suggested image alt-text: “Auto WebP Converter settings page in the WordPress dashboard showing the conversion quality slider set to 80.”)
Settings Walkthrough (With Real Examples)
All options live under Settings → Auto WebP Converter.
A) Conversion Settings
Convert Quality (0–100, default 80). This is the compression “sweet spot.” A setting of 80 gives virtually no visible quality difference while shrinking files hard. Recommended starting points:
| Site type | Suggested quality |
|---|---|
| Blog / business site | 80 |
| Photography portfolio | 85–90 |
| Directory / listings site | 70–80 |
| News / content-heavy site | 65–75 |
Changing quality only affects future uploads.
Allow Image Type. Choose which formats get converted; unchecked types upload as-is. The default is JPEG and PNG. Options include JPEG (biggest savings), PNG (transparency fully preserved in WebP), non-animated GIF (animated GIFs are auto-detected and never converted), BMP (works on virtually all modern hosting), and TIFF (requires Imagick).
Convert Media Library Uploads (default ON). The master switch for regular uploads via Media → Add New or the post/page media picker. Turn it off only if you want conversion limited to specific contexts (for example, only Directorist images).
Keep Original Images (default OFF). With it off, you get maximum space savings. Turn it ON if you sell original files (photographers, stock sites) or want safety copies. Just note that storage roughly doubles for those uploads, because thumbnails are generated for both the WebP and the untouched original.
B) Featured Image Settings
Post Types for Featured Images. Enable conversion specifically for featured images per post type (Post, Page, or any custom post type that supports featured images). Default is none selected. This matters most when the Media Library master switch is off and you want fine-grained control.
C) Directorist Settings (appears only when Directorist is active)
The plugin automatically teaches Directorist to accept .webp files. There are two toggles:
- Directorist post type (Admin Panel), default OFF. Converts featured images uploaded while editing a listing in wp-admin.
- Add listing page (Frontend), default OFF. Converts images that visitors upload through the public “Add Listing” form. This is powerful because users often submit huge 4–8 MB phone photos. Per wpXplore’s documentation, a directory receiving 50 listings/week × 3 photos × ~3 MB (~450 MB/week) drops to roughly 130–150 MB per week at quality 80.
Recommended Setups (“Best Settings” Cheat Sheet)
| Goal | Quality | Formats | Key toggles |
|---|---|---|---|
| “Just make my site faster” (most sites) | 80 | JPEG + PNG | Media Library ON, rest off (defaults) |
| Photographer / portfolio | 85–90 | JPEG + PNG | Keep Original Images ON |
| Directorist directory | 75–80 | JPEG + PNG | Media Library ON + both Directorist options ON |
| High-volume content site | 70 | JPEG + PNG + GIF | Featured images enabled for Post |
The Payoff: What You Actually Get
- Faster page loads. Smaller images mean less to download, and image weight is the most direct lever you have on load time.
- Better Core Web Vitals and SEO. A lighter hero image improves LCP; Core Web Vitals act as a tiebreaker in Google rankings when content quality between competing pages is similar.
- Lower hosting costs. Storing only the WebP (not two copies of every file) means smaller disk usage, smaller backups, and less bandwidth served every month.
- A true set-and-forget workflow. Once it’s on, you never think about image formats again. Every upload, everywhere, is handled automatically.
- Peace of mind. The size-check, uploads-never-break, and never-convert-animations safety nets mean you can’t accidentally make your site worse.
Troubleshooting Tips
- Filenames aren’t
.webpafter upload. Confirm the Media Library master switch is on, and that the file type (e.g., JPEG/PNG) is checked under “Allow Image Type.” - You see an admin notice about missing libraries. Your host lacks both Imagick and GD with WebP support. Ask your host to enable Imagick (preferred) or GD with WebP. Uploads keep working in the meantime.
- A small image stayed in its original format. That’s by design. The smart size check kept the original because the WebP wasn’t smaller.
- You need an original back. Originals are only recoverable if “Keep Original Images” was enabled at the time of upload.
Frequently Asked Questions
Does Auto WebP Converter convert my existing Media Library images? No. It converts images at upload time only. Bulk conversion of existing images is on the roadmap. For now, every image uploaded after activation is converted automatically.
Will WebP images display in all browsers? Yes. WebP works in every modern browser (Chrome, Safari, Firefox, Edge, and mobile browsers) at roughly 97.4% global support as of April 2026 (caniuse.com/webp). Safari, the last holdout, added support back in version 14 (September 2020).
Will converting to WebP hurt my image quality? At the default quality of 80 there is virtually no visible difference. Photographers who want extra headroom can raise quality to 85–90.
Does it preserve PNG transparency? Yes. PNG transparency is fully preserved in the WebP version.
Will it slow down my website? No. Conversion runs only at upload time and adds just a fraction of a second. Nothing runs on your public pages, so there is zero impact on visitors.
What happens to animated GIFs? They’re automatically detected and never converted, so your animations always keep working.
Can I get my original files back after conversion? Only if “Keep Original Images” was enabled when the image was uploaded. With it off (the default), only the WebP is kept to save space.
What if my server can’t convert images? If neither Imagick nor GD with WebP support is available, a dashboard notice appears explaining what to ask your host for, and uploads continue to work normally (just unconverted).
Conclusion: Turn It On Once, Benefit Forever
Image optimization is the highest-leverage speed fix available to most WordPress site owners, and WebP is the format Google itself recommends. Auto WebP Converter by wpXplore makes it effortless: it converts every upload to WebP automatically, stores only the smaller file, optimizes every thumbnail size, and protects you with smart safety nets, all without touching your visitors’ experience or your daily workflow.
If you want a faster site, better Core Web Vitals, higher search visibility, and a lighter hosting bill with a genuine set-and-forget setup, install Auto WebP Converter by wpXplore today at wpxplore.com (there’s a 15-day free trial), activate it, and upload your next image. It’ll arrive as a lean .webp file, and you’ll never have to think about image formats again.

Leave a Comment